


WordPress Image Optimization: 7 Tips for Faster Sites & Automation
WordPress is a great CMS for building a blog or website with its high level of functionality and flexibility. But it doesn’t always perform as quickly as you might like.
When we talk about improving WordPress site speeds, the conversation usually revolves around optimizing your database and loading times using caching plugins and other methods. But what about image optimization? Why is it essential, and how can it help?
WordPress image optimization is necessary to improve loading times by reducing file size without compromising quality. This makes them much easier to load, which is crucial for SEO (because Google looks at site speed when deciding where to rank you) and creates a better visitor experience.
Yet, optimizing images on WordPress can be tedious and tricky at times. In this article, we’ll walk you through some quick wins and how you can automate image optimization for WordPress.
Why is Image Optimization in WordPress important?
Images and other forms of rich media have become a significant element in improving user experience as the web becomes more visual. According to HTTPArchive, the most common cause of page bloat is unoptimized images. Over the last few years, many web developers have noticed a significant drop in site speed, and images are one of the main culprits.
With images comprising up to 75% of the average web page weight, visitors don’t have the patience to wait for a slow-loading site, and 39% will leave before it loads. Especially for e-commerce and real estate industries where content relies heavily on visuals, optimizing images should be prioritized.
Furthermore, Google’s algorithms consider site performance when displaying search results, which means slower sites are less likely to show up at the top of the list.
The goal of optimizing images then is to maximize the quality of visuals with the least bytes and pixels, thus improving your overall site’s speed.
Challenges of Image Optimization in WordPress
WordPress has undoubtedly made things a lot easier for website owners. While image optimization is considered in the CMS with easy-to-use functionalities, its basic optimizations do not grant users sufficient control.
Limited Compression Capabilities
WordPress uses native image compression, which does not allow you to control the level of reduction of your visual assets. Some of your visuals may lose quality and appear pixelated when compressed. For larger visuals, the default compression may not be as effective compared to other tools available on the market.
Modern image format WebP (30% smaller than JPEG and PNG), is now supported since WordPress 5.8. Yet, these images must be manually converted before upload using image editing, command-line conversion, or web-based tools.
Duplicated Images
WordPress automatically creates several image sizes (large, medium, thumbnail) whenever a user uploads an image. While this is meant to make things more convenient to save you time to resize images manually, images duplicated across directories can consume server space and slow down web performance.
Image Optimization is more than just compression
Even though WordPress image compression is important, optimization goes beyond that to include other processes that cannot be customized on the popular CMS. These include lazy loading, utilizing responsive images, and serving images over a Content Delivery Network (CDN), which can be quite limited if users rely solely on WordPress.
To solve these challenges, we’ll go through the tips to optimize images in the CMS manually or via automated solutions and its host of plugins.
How to Optimize Images for WordPress?
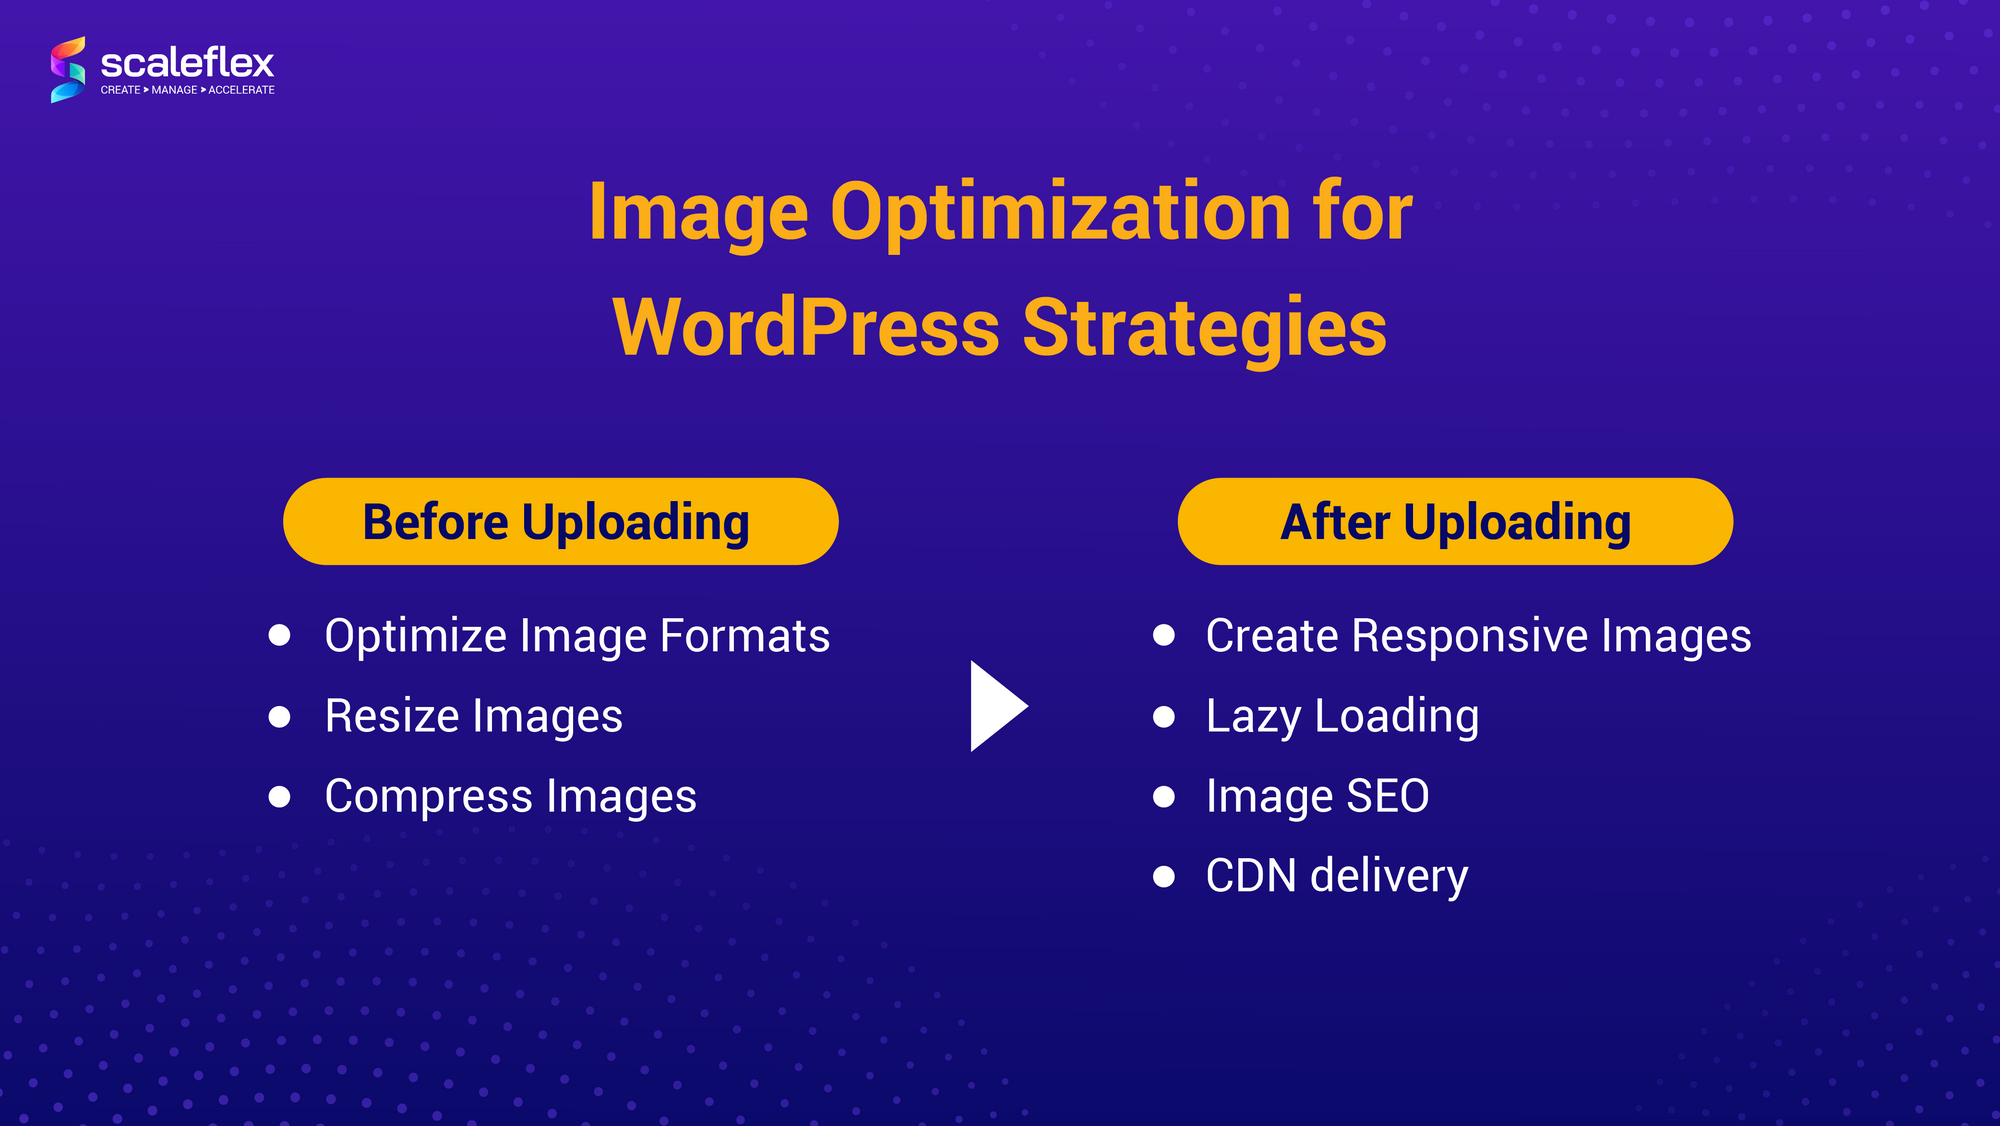
Before Uploading
1. Ensure the Right Image Formats
Before uploading visuals onto the CMS, picking suitable image formats based on what you want to communicate is essential; especially since the CMS will compress the images without changing the formats. For WordPress websites, these are the recommendations:
- Select PNG if fine details are required; great for logos and graphics and it supports transparency
- Choose JPEG for photographs as it offers good compression
- Use WebP as your main raster image format as they grant 25 - 35% compression gains as compared to JPEG and PNG, granting significant wins in web performance. The only limitation is that as it is a modern image format, there is still a small percentage of browsers that do not support it. How to optimize images for WordPress for such formats? You’ll need tools that can detect a user’s browser and serve the right image format to them.
2. Know Your Image Size
It would also be good to resize your images before uploading if you know the purpose of these images. You don’t need a visual of over 1000px if you intend to use it as a small icon on the webpage. Larger dimensions would mean these assets carry more weight, making it harder for optimization.
The WordPress image dimensions to take note of upon uploading an image to the media library is that it creates a set of resizes while retaining the original image:
- Full size (the original image)
- Large (1024px)
- Medium (300px)
- Thumbnail (150px)
These resizes are done so that you get to use it in different ways without manually having to resize them. Bear in mind that each duplicated image takes up server space, so it will be good to deactivate them if you know that you don’t need them.
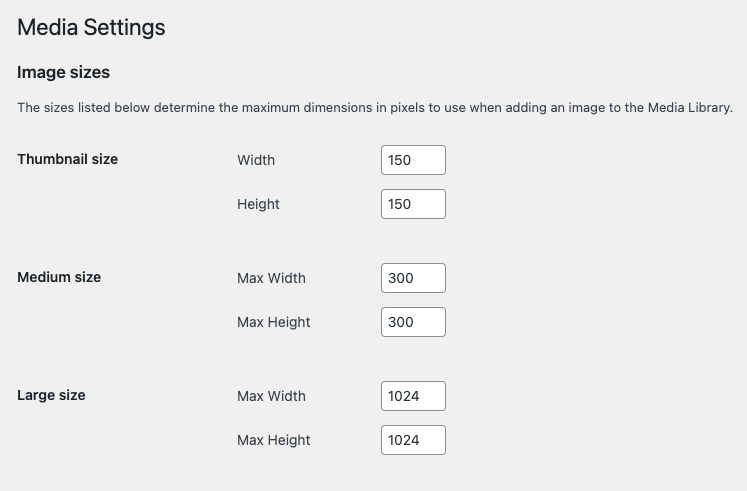
To customize or remove these resizes, you’ll have to go to media settings on the dashboard. You’ll see the image sizes we’ve mentioned and you should change them all to your desired sizes (to customize them) or to zero (to save only the original image).
After Uploading
1. Use Image Compression
Image compression on WordPress is less efficient due to its default compression algorithm. It compresses images to 82% when users upload them since version 4.5. Compressing images before uploading them to WordPress grants you control over the type and level of compression and image quality. This can be done manually via image-editing software like Adobe.
Since you’ll need to compress all visual content to your website, doing so manually can be extremely time-consuming. Today, numerous online tools like tinypng.com can help you bulk process your images with minimal compromise on quality. Compression also ties in with the type of image format you choose as modern image formats like WebP delivers efficient compression.
What’s great about WordPress is installing plugins that can help automate that process while granting you control over quality.
2. Utilize Responsive Images
WordPress has had responsive image support ever since 2015, making it simple to serve visuals in different resolutions for any screen size your visitors may be using. The (srcset) image tag parameters that the CMS has is still somewhat limited with basic responsive choices.
For more technically-savvy users, you can definitely opt for different ways to make responsive images. These include using picture elements, JavaScript and CSS Media Queries.
Another challenge of responsive images in WordPress is that duplicate copies may take up significant server space. The workaround? Users can look at cloud storage solutions and adaptive distribution through third-party services or plugins like Cloudimage and Just Responsive Images.
3. Lazy Load Images
As an optimization strategy, "lazy loading" loads visible material first and then waits for the rest of the content below the fold to download and render. The benefits? It speeds up website load times so that users get to see your site faster, and because it only delivers images that are viewed, you get to conserve your server bandwidth. It is what Google loves and is a strategy you should take, especially when your web page has many high-resolution photographs and visuals.
A way to implement that is to use the loading property (src) on an “img” element to inform the browser to hold off loading images that are not yet on the screen until the user scrolls down. Again, plugins need to be considered for advanced lazy load options such as customizations and automation.
4. Optimize Images for SEO
When search engine crawlers come to your site, they can't see the images you have loaded there. Unless you give them extra information about the images, they won't know what those images are or how important they are to your website.
Image optimization for SEO, including metadata, descriptive words for file names, alt and title tags for images, is essential so that search engine crawlers can understand the images on your website.
Before upload, you should give your file descriptive names and then after uploading through the media gallery; you can include the rest of the metadata like the title and alt text.

Yet, for businesses that upload numerous images daily, such as Real Estate, Bloggers and e-Commerce, including these tags on hundreds, if not thousands of visual assets is impossible. Again, image optimization plugins are available to help you do so.
5. Serve Images Over a CDN
The final piece of the Image Optimization for WordPress puzzle is to transmit the visuals to end-users using rocket-fast content delivery networks (CDNs). CDNs are networks of globally spread servers that cache static material on a website near the visitor’s location. Its advantages include:
- Lower latency and faster loading times experienced by users located far away from the data center host
- Absorbs high traffic during peak periods to save money on hosting
- Protects websites from DOS assaults
WordPress Image Optimization Plugins
The most enticing feature of WordPress is the ability to use various plugins to meet your needs. It's also easy to use, making it appealing to bloggers and developers alike. You find that many of the tips above do have some limitations when it comes to optimizing images on WordPress that can cause issues for users. But not to worry as there are numerous image optimization plugins for WordPress that can automate the above strategies!
Some of the popular plugins include Imagify, EWWW Image Optimizer, Optimole, ShortPixel Image Optimizer, and Smush.it. These image optimization plugins for WordPress can automate most of the above, except for accelerating your images through CDNs.
Image CDN: Cloudimage WordPress Plugin
Cloudimage, an image CDN, is an automatic image optimization Wordpress plugin that addresses this missing link by delivering compressed, pixel-perfect, responsive images worldwide at lightning speeds.
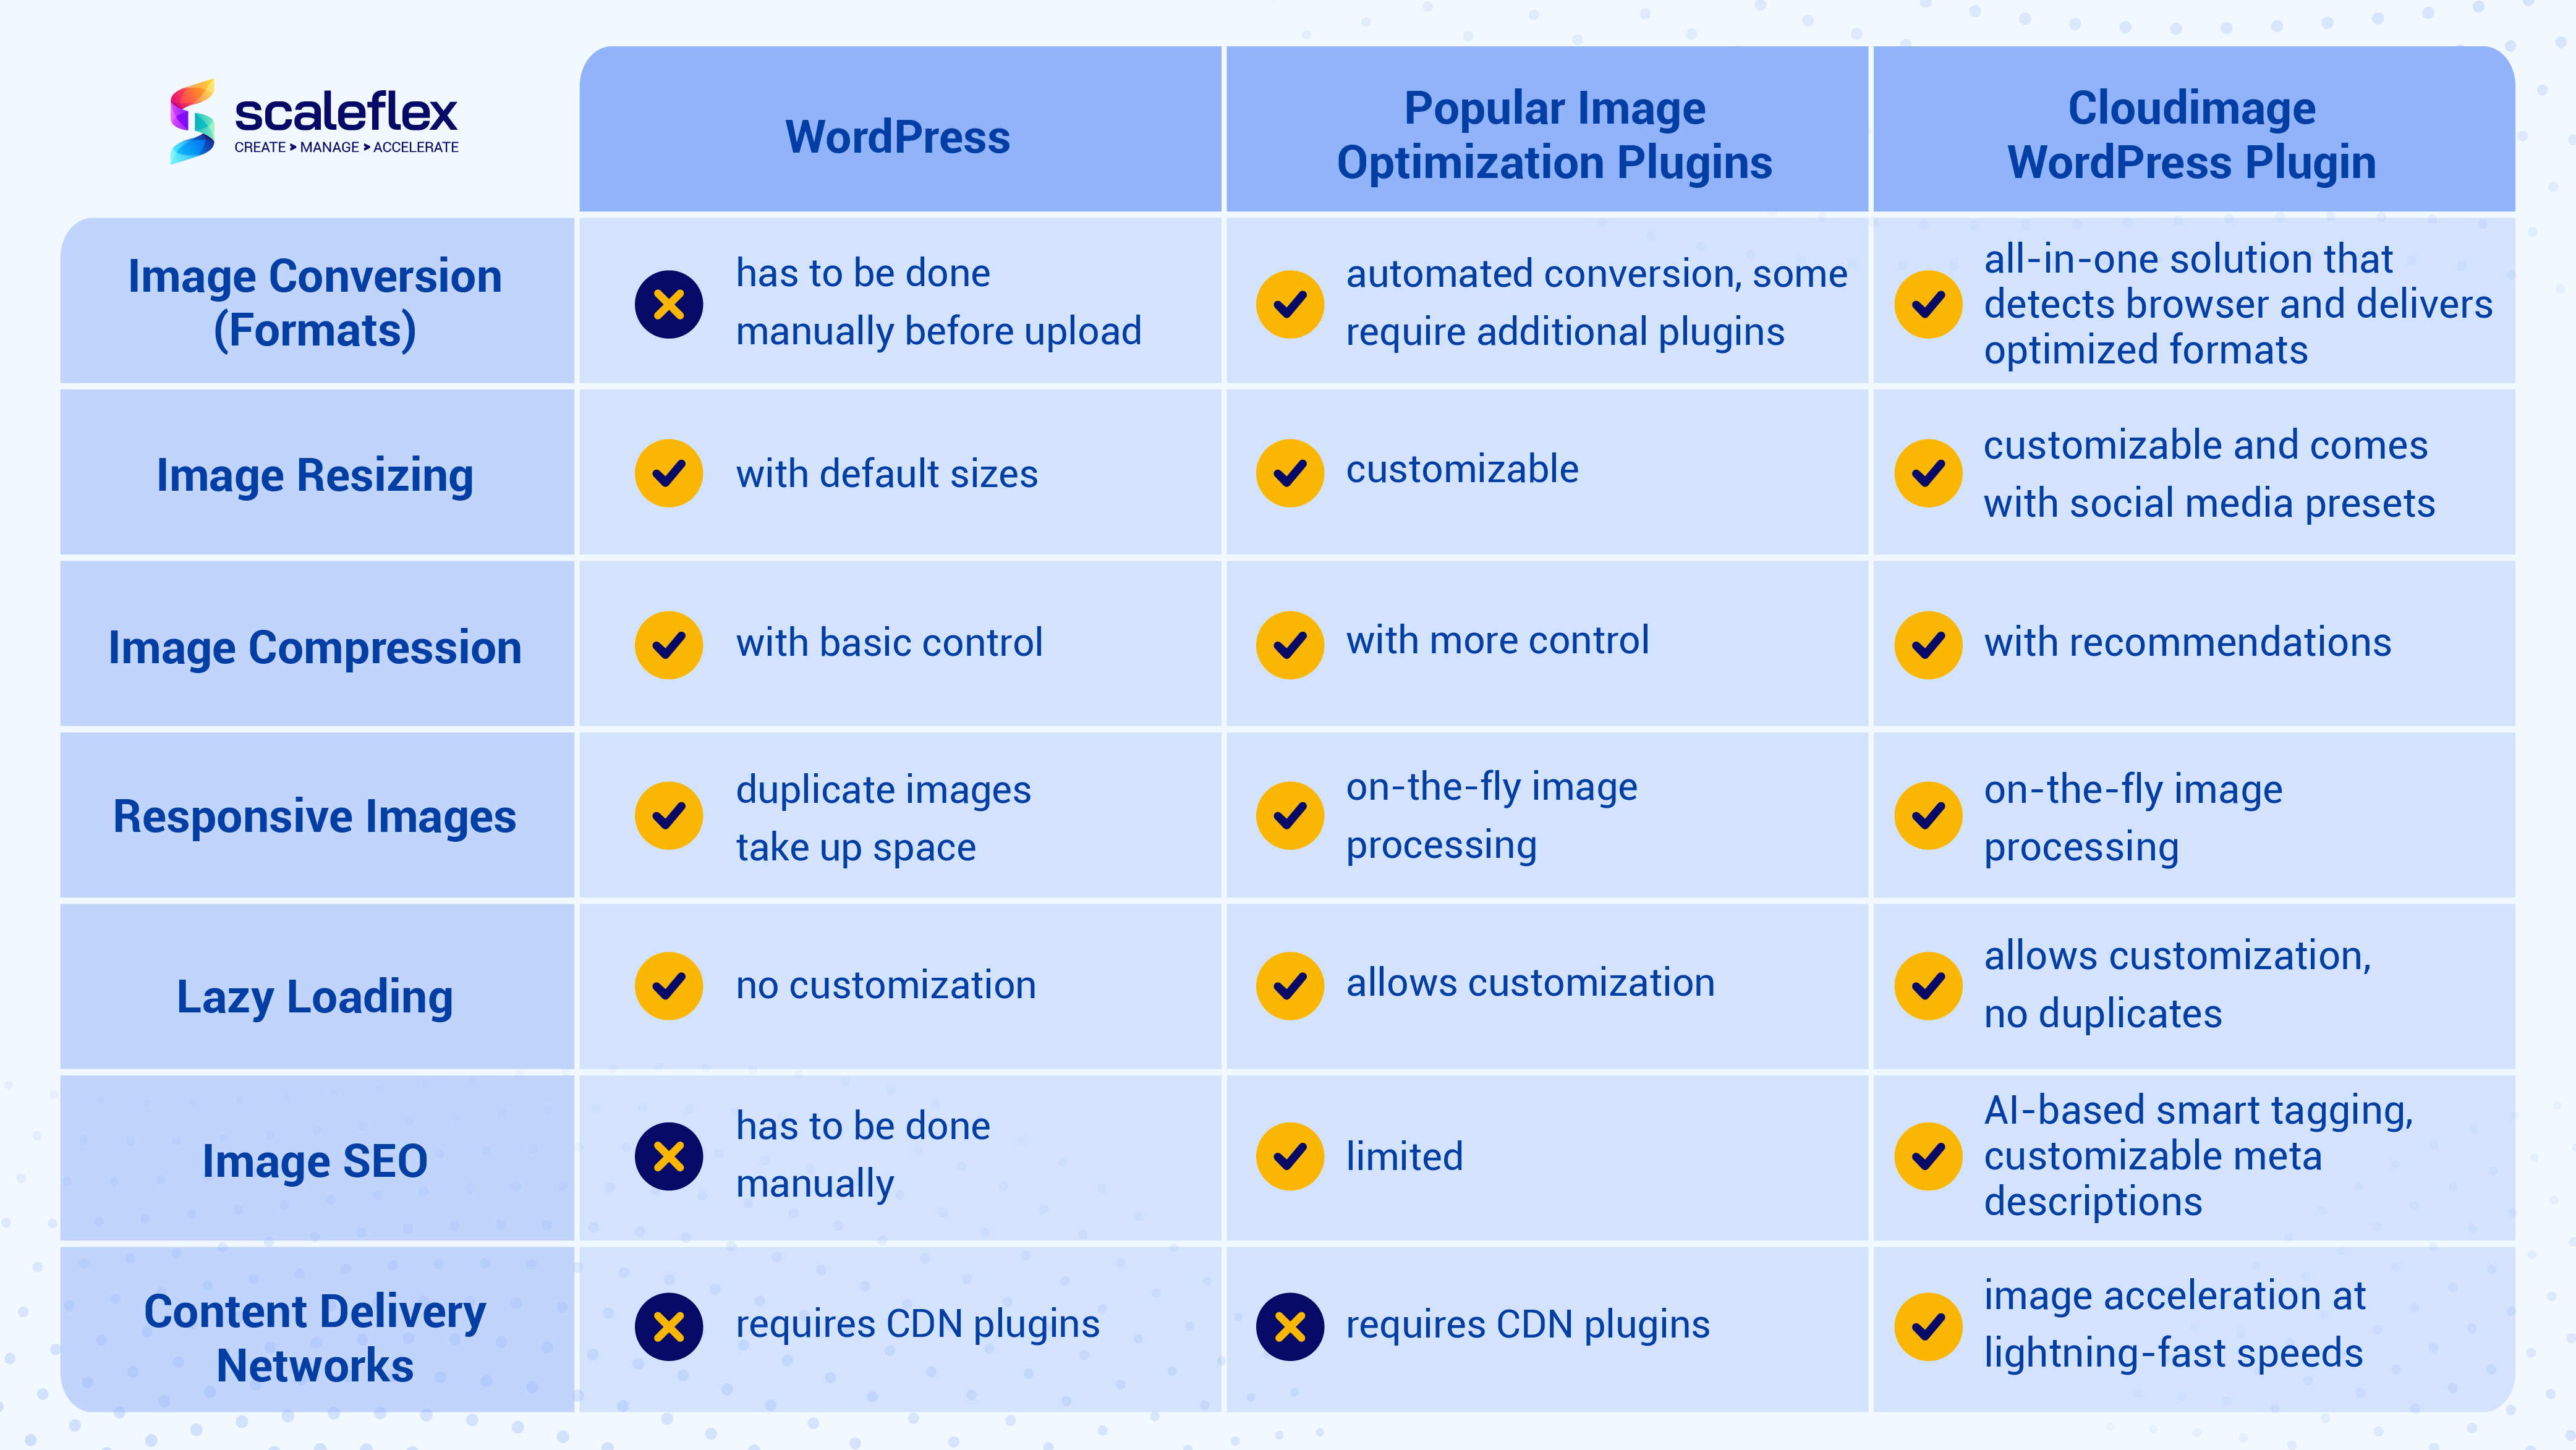
We welcome you to explore the Cloudimage WordPress plugin. Cloudimage offers robust WordPress image optimization competencies that help you detect your users’ browsers and serve the right image formats that are responsive and light, with minimal compromise to quality!
Look forward to best-in-class lazy loading and AI-based image SEO tagging as the Cloudimage WordPress plugin manages and optimizes all your digital assets, improving your site’s Core Web Vitals!
Common WordPress Image Optimization Errors
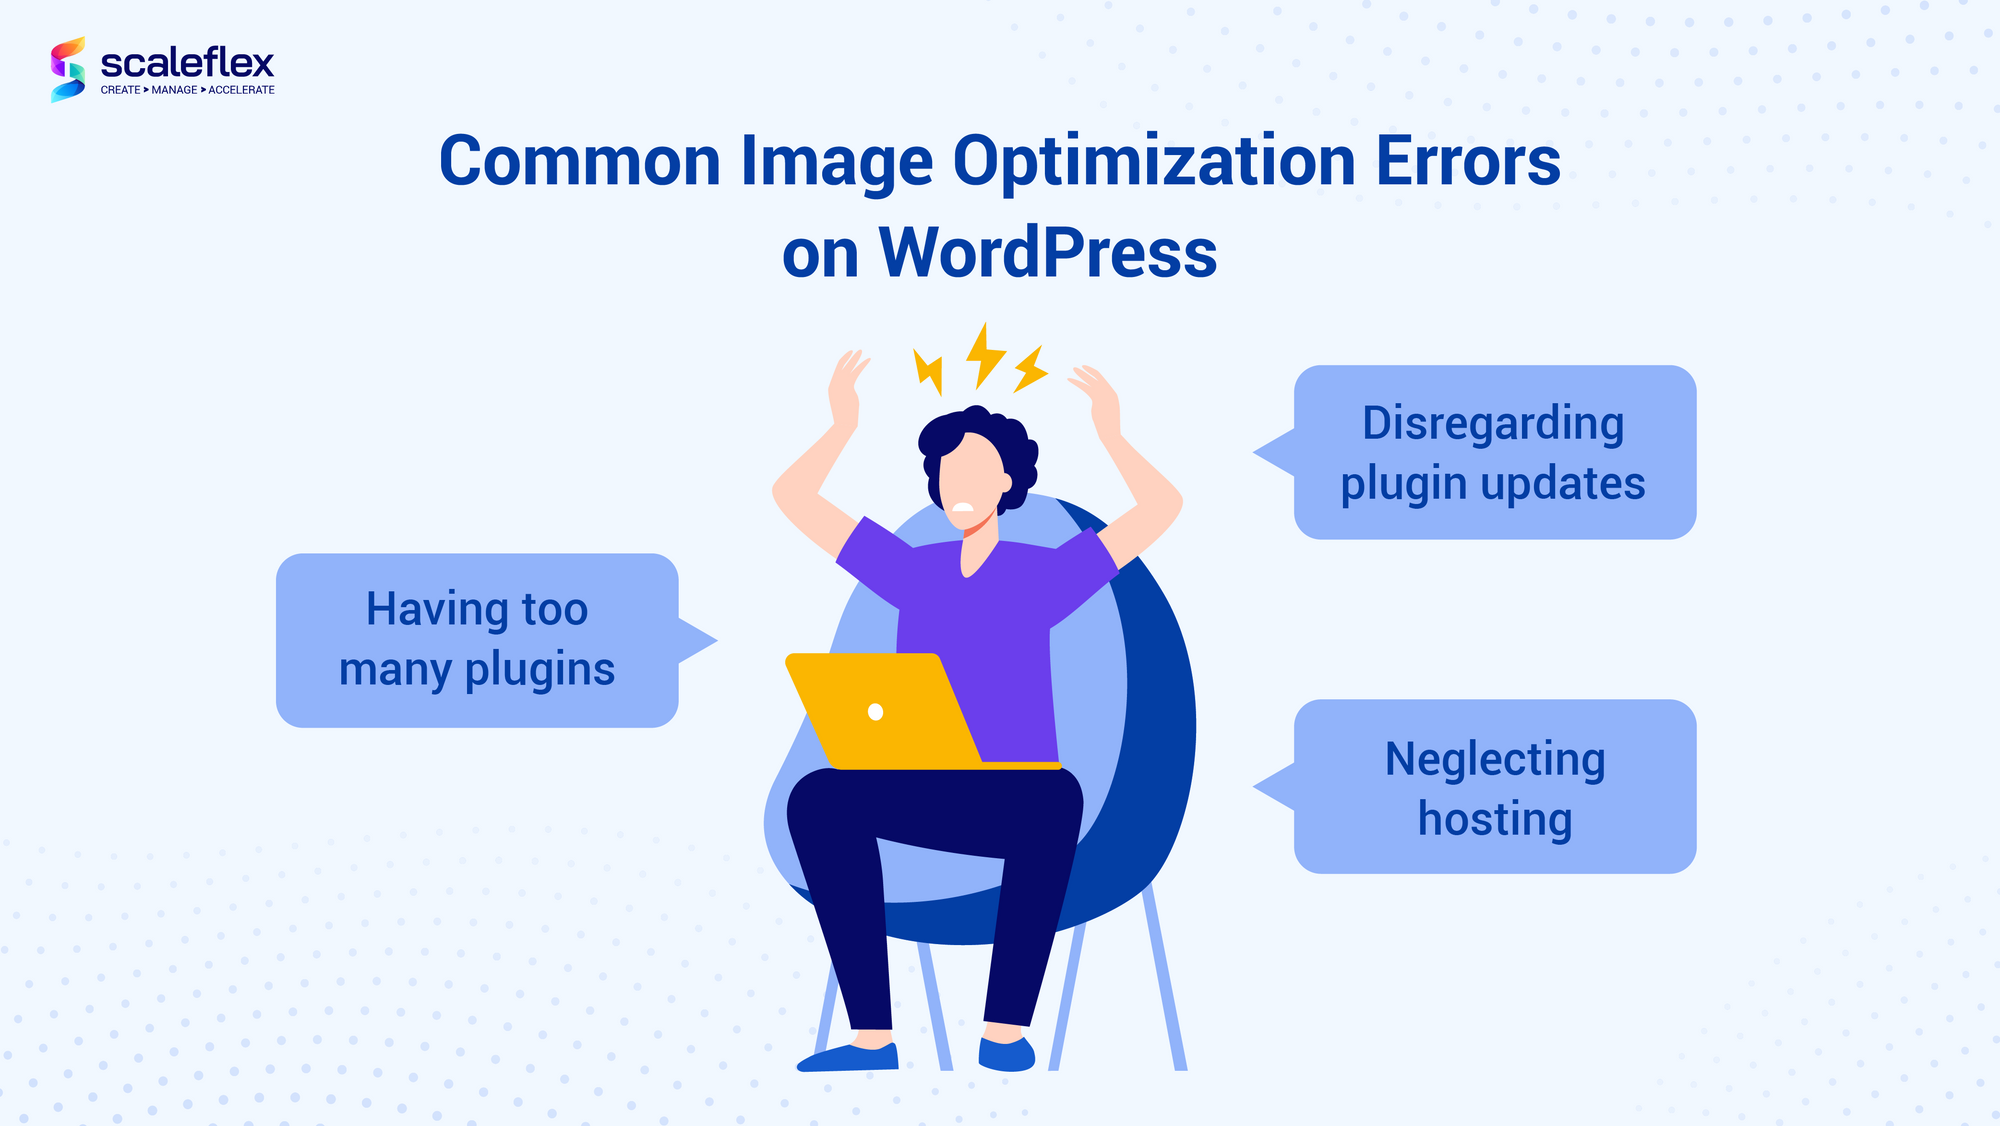
Disregarding Plugin Updates
You can see how plugins are necessary to automate image optimization processes. Many times, users often install a plugin and leave it running, forgetting to update them regularly. WordPress updates the platform periodically, and plugin developers do the same to ensure that they run smoothly on your site.
Having too many plugins
There are plugins for almost everything on WordPress, and sometimes, that can be a problem in and of itself.
Plugins can quickly get complicated if you don't know what you're doing. While various plugins make image optimization much more accessible (for example, by automatically resizing and compressing your images before uploading them), they often come with problems. For example, some plugins will automatically compress every single image on your site, including graphics that would look much better in a larger file size; others won't apply their effects retroactively, meaning that any previously uploaded images won't be optimized after installing the plugin.
Other times, beginners tend to install too many of them, which may eventually slow down the site. So what if your images are optimized? Having to run so many plugins can become confusing over time.
Neglecting Hosting
If you don’t have the right hosting provider or package, your WordPress site will not experience the fast load times that you desire. All the optimization work done previously would then all go to naught!
Conclusion
We can’t emphasize the importance of image optimization enough as images are one of the most common causes of slow sites. Unoptimized images and slow sites can hurt your SEO, reduce your ranking in search engines, increase bounce rates and can cause you monetary conversions in the long run.
The ease of use and the plethora of plugin offerings of WordPress makes it a popular CMS choice for many users on the net. While we recognize some of the challenges users face when optimizing images on WordPress, we have to applaud the CMS developers’ improvement efforts. We see additional image optimization features added throughout the years.
To that end, plugins rule the WordPress CMS, and the best way forward is to search for an all-in-one plugin capable of automating all, if not most, of your required optimizations.
FAQs
Are there free plugins to optimize my images on WordPress?
Yes, numerous free-to-use wordpress hook into image optimization plugins are available (for limited features) to optimize your images on WordPress. Users looking for more advanced and supplemental features often have to start paying for these services.
How can I stop WordPress from compressing my images?
To disable the default image compression in WordPress, you’ll need to include this code in your theme’s functions.php file or within a site-specific plugin.
add_filter('jpeg_quality', function($arg){return 100;});This sets the value to 100 and the compression is at its highest quality, instead of the default.
Does WordPress automatically optimize images?
WordPress does basic image optimizations. As every website’s use case can differ, WordPress optimizations are not able to give users sufficient control. For more advanced optimizations, plugins can be used as a go-around.
Can I optimize images in WordPress without the use of plugins?
Before uploading your images, you can optimize file formats and sizes using web-based tools. After uploading, you can work on other image optimization strategies utilizing the existing WordPress functionalities, including metadata within the image gallery manually.
Cloudimage can also be implemented on WordPress via JS without a plugin.
Plugins are there mainly to automate the process and provide a hassle-free way to optimize your images.


